Strongback setup on 20′ gaff cutter.

IMG_2179

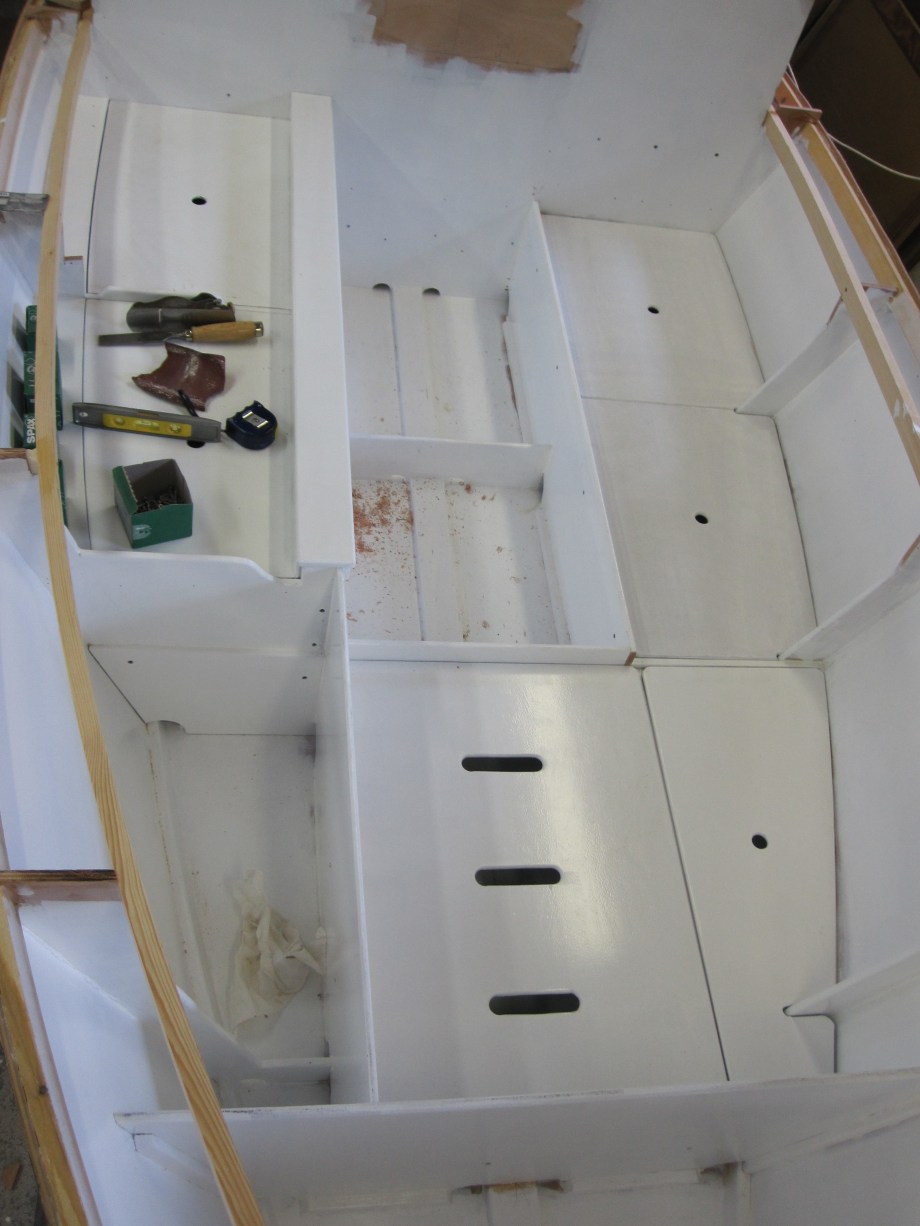
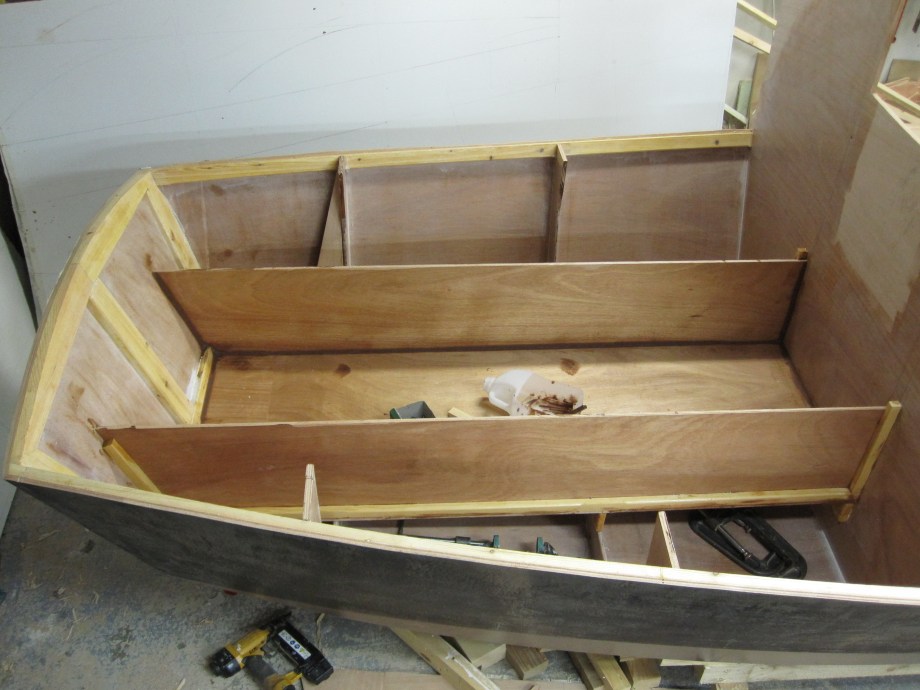
Well here I am starting to set up the strongback and bulkheads on which the boat hull will built. As you can see I had to open the wrkshop doors and extend out a little to give enough room to walk around the boat. The planking lines are already determined in the plans for this boat so there was no need to get a good all round view of the hull to check that everything looked right. It’s a little hard for a boatbuilder to relinquish the control of the plank lines but in this case I was pretty confident that it would work out.IMG_2180

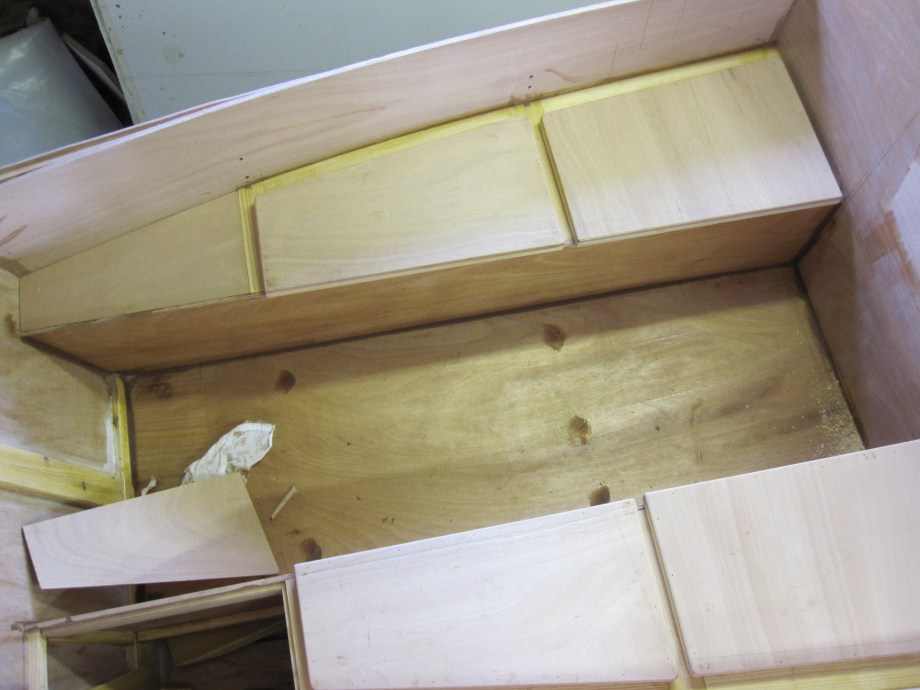
I stared with the two midship bulkheads to get an idea of how close I could get the boat to the floor. I’m not that tall and every inch lower made the job that much easier. I was still able to get in under the hull to clean up the epoxy fillet joints as each plank went on.
IMG_2186

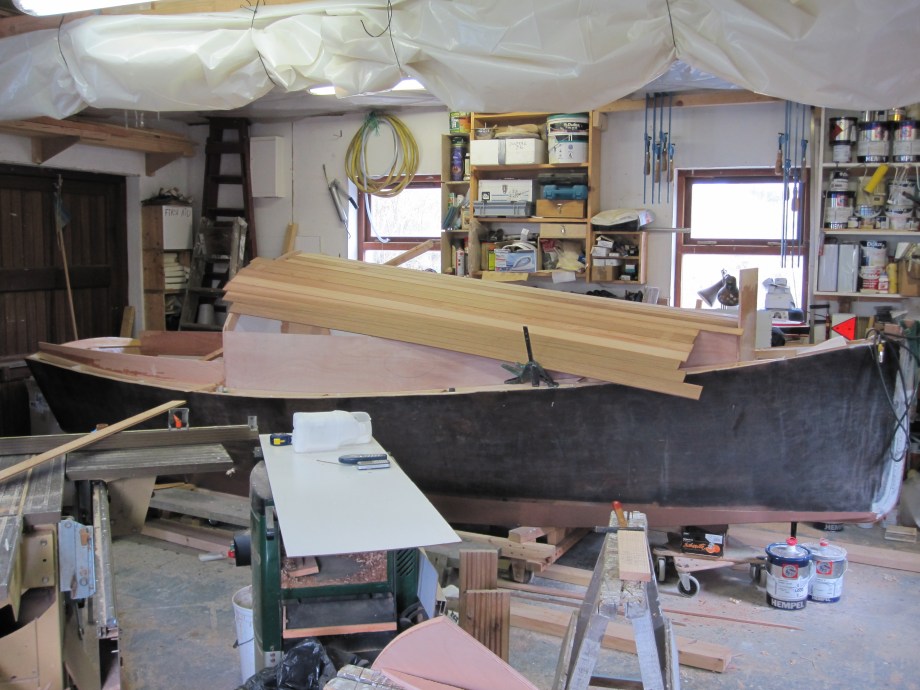
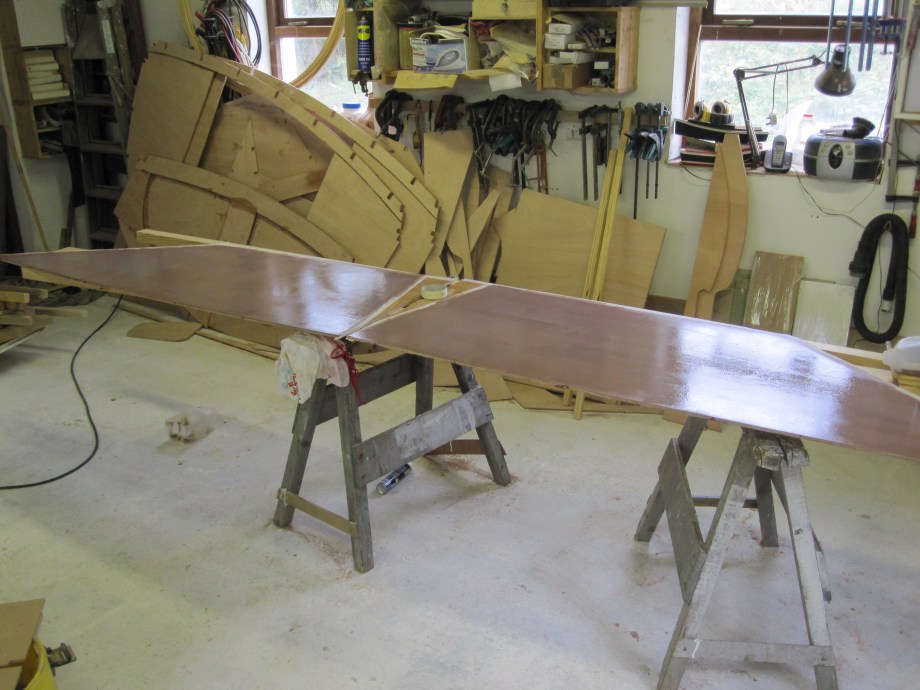
The forward end of  the boat is now in place with the stem and forefoot dry fitted into the frames.
IMG_2188

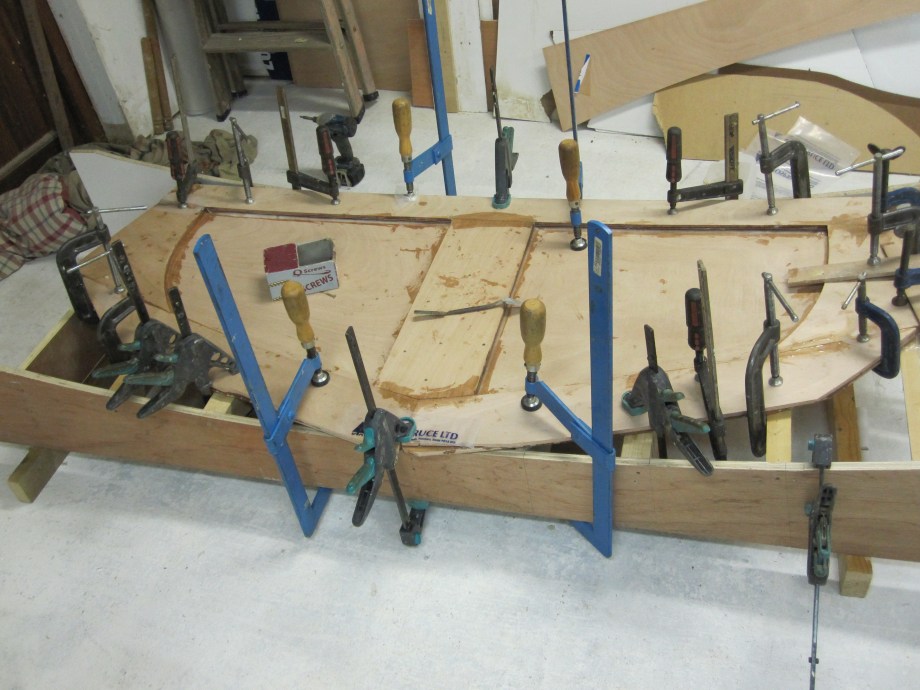
Now we’re rocking, next step planking the bottom now that the backbone and centreboard are glued in. Check back soon to see further progress.

In the meantime why not give Tiernan a ring +353 28 8973 to discuss building or restoring your own boat. The phone line is back working after quite literally blowing away during the bad weather here.

Roeboats, Ballydehob, Co. Cork, t:+353 (0)28 38973 m: +353 (0)86 158 69 37 e:roeboats@ymail.com

Spars for Cape Henry 21

Once I had the Bulkheads cut out and things like the rudder and centreboard case made I decided to make most of the longer spars while I had the space to work. Above are a few Photos of the building of the birds-mouth mast. This is a hollow mast made from narrow strips of wood that the corner of each piece fit in a right angled groove in the edge of it’s neighbouring piece to make an, in this case, 8 sided spar that is then planed and sanded into a round cross section.

It’s far more complicated to describe than actually to do, although it is a bit of a challenge handling very flexible 20′ long 2″X1″ pieces of wood in a 20’x22′ space. I did a dry clamp up on the trestles to make sure it would go together. When I was satisfied all was well I did the final glue up, after a frantic 20 minutes spreading glue, in custom cradles I lay along the level floor. It worked out well and the finished mast weighs around twenty kilos which is pretty light for a mast of this diameter.  The boom and mast are simple rectangular laminations for the moment, I might make them round to improve their looks and reduce their weight a little in the future.

If you’d like to be involved in having your next or first boat being built why not drop Tiernan an email at roeboats@ymail.com or give me a ring on +353 86 158 6937. Our landline blew away last week so it’s out of action for the moment.

Roeboats, Ballydehob, Co. Cork, t:+353 (0)28 38973 m: +353 (0)86 158 69 37
e:roeboats@ymail.com

Home

Starting to make bulkheads etc.

IMG_2162
Here’s a photo that illustrates two things in one. In the foreground on the trestles are the sides of the centreboard case all epoxy coated and with a covering of epoxy copper anti-fouling. Probably a bit overkill but it would be a flippin’ terrible job to do when they were glued together and in the boat. And up against the wall in the background you can see the cut out plywood bulkheads all ready for setting up on the strong-back.
The plans came with full size computer generated Mylar patterns for the bulkheads and while that was useful I couldn’t help but think while I was building the hull shell that a proper lofting of the boat could have given me lots of useful information such as being able to lift the frame bevels directly from the lofting instead of fairing them once set up. If you look carefully at the transom in the photo above you can see that I had to leave it oversize to account for the fact that the pattern was to the aft face of the transom but the forward face is the larger one. Had I being able to loft the boat i.e. had a table of offsets, I would have had both faces and the angle between them. Anyway it wasn’t that big a deal in the end but it goes to show computers can’t replace everything.
IMG_2168
Just in case you were getting clamp withdrawal symptoms here’s another photo of the rudder being laminated up. And do not fret dear reader there will be more camp photos in the next posting.

Until next time. In the interim if you feel like having your own beautiful boat built don’t hesitate to give me a call +353 28 38973. I’ll be glad of the distraction from making pieces of wood shaped on six sizes fitting together.

Roeboats, Ballydehob, Co. Cork, t:+353 (0)28 38973 m: +353 (0)86 158 69 37 e:roeboats@ymail.com

Home

Start of a new Boat.

IMG_2156
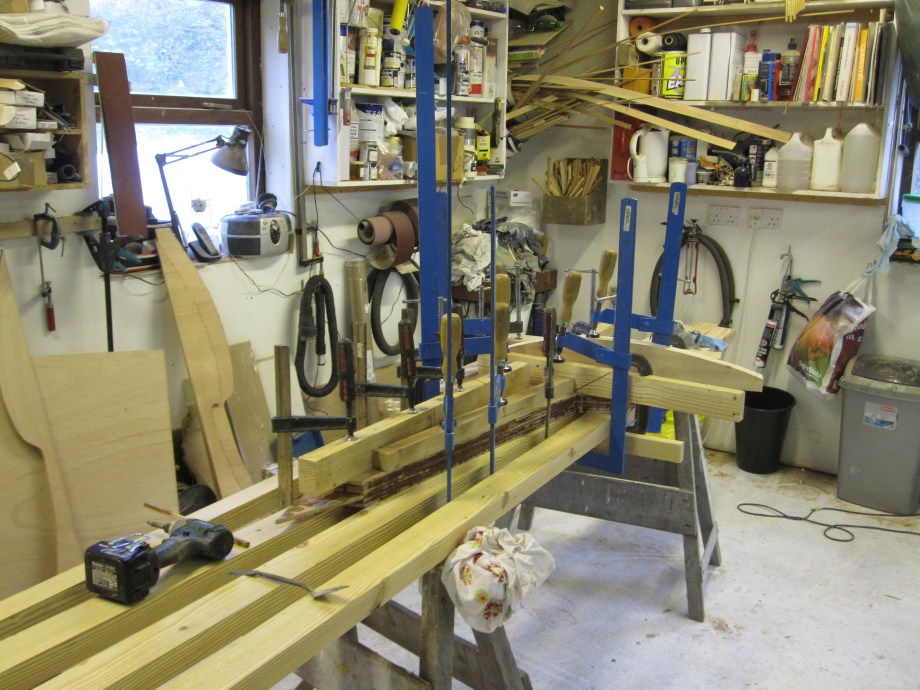
Well if you’ve ever looked at a wooden boatbuilders website there is usually more than one photo of a pile of clamps holding down some piece of wood or other. And today’s post continues that long tradition, probably started sometime in the late 1990’s perhaps even earlier. That’s a couple of million years ago in WWW land.

IMG_2157

Alas I’m digressing from the point, which is the start of another boat here at Roeboats. What you’re looking at here is a rather nicely curved transom of a Cape Henry 21 designed by South African designer Dudley Dix (I wonder if he’s anything to the Dix’s of Bantry? Must ask) She’s 21’/6.3M long with an 8’/2.4M beam and 19″/0.5M draft with the centreplate up. You’ll discover more details as the build progresses. She’s set to be sailing the beautiful waters of West Cork in Summer 2014.

As always if you’d like to start discussing having your own dream boat built you’re very welcome to give me a ring +353 86 1586937 or send me and email and we can get the ball rolling.

Roeboats, Ballydehob, Co. Cork, t:+353 (0)28 38973 m: +353 (0)86 158 69 37 e:roeboats@ymail.com

Ready for Launch.

Well after many hours setting up the rig, I think the boat is finally ready for the water. I don’t know how many times I have taken the masts in and out of the boat at this stage. I know it was a lot. Checking and fitting all of the blocks and strops so that the halyards and reefing lines would have fair leads.

IMG_2087

Now before you eagle eyed observers start complaining I know there are a few things wrong with the rig in this picture. For a start the mizzen boom snotter has slipped and the sail is not set correctly. Also the lashing of the sail to the gaff is probably too tight and the gaff could probably do with a little more peaking. There are more than likely a few more alterations that will need doing once the boat is sailed a few times. More of that in a subsequent post.

IMG_2089

If you would like to discuss having your own dream boat custom built why not give me a call on +353 28 38973 or +353 86 1586937.

IMG_1945This is a rather poor photo to illustrate the hours and hours of work that have gone into the boat since the cabin top was attached. There’s coats and coats of paint and indeterminable hours of sanding. There’s also another boat being built in the workshop while work is ongoing on this one. She’s coming together nicely but it very hard to see how she’ll look when finished while she’s in such a tight space. You have to move the boat around as you work on one side or the other.

Cabin top goes on.

Photos of progress are fw and far between from now on as just as I was starting the last stage of finishing this boat I received an order for 2 more viking type faerings for the TV series “Vikings” that is filming in Wicklow. Also The Game of Thrones people wanted to have the two boats I built last year modified for another shoot. So it was head down and ass up from now on. So I didn’t have much time or space to take photos.IMG_1866

Anyway here’s the dry fitting of the cabin top. It’s built strip plank method from 2.5″ western red cedar tongue and groove planking. This is pretty much the widest planking that would take the curve of the cabin top.

IMG_1871This is the top all glued and screwed down and ready for trimming.

IMG_1872And here she is ready for sheathing in 4 oz glass and epoxy. The glassing was down outside in a temporary shelter that I built on to the front of the workshop. I think I’m pretty smart but even I knew that would be a bit difficult to build two 16′ boats in  a workshop that’s only 22′ long.

Interior fit out on cabin Sharpie.

Here the start of the interior fit out as you can see the boat will be fitted with chemical toilet for overnight cruising. You can also see that top of the offset centreboard case and the locker tops that form  some counter space.

IMG_1837

The cockpit at this stage is pretty well finished being assembled and will have watertight lockers port and starboard which will provide plenty of space for bulky like fenders and warps etc. The last panel on the starboard side has been left off until the mizzen mast step is fitted and the hole for the mast is cut.

IMG_1838You can see in the photo below that the interior is painted and you can make out the base for the seats/berth. It’s pretty snug but will be nice and cosy for one person. Once again there’s lots of storage under the bunk and there are two large bins for dry bags and other gear. It may seem a very simple layout but it has taken many different versions to get to the final solution. There’s not a lot of space in a 16′ boat for a fully featured cabin.

IMG_1865

Cockpit started on cabin sharpie.

IMG_1822

Here she is epoxy coated on the inside and having the cabin top mocked up to see how it might look. You can see the outline of the epoxy on the bulkhead that shows the high cambered top that should give enough headroom and increase the righting moment if the boat were to be knocked down.

IMG_1823

I’ve also started the construction of the cockpit which will have a self draining footwell, (it’s not high enough above the waterline to be called self bailing) and self bailing from the seats up as there will be large scuppers port and starboard.

Roeboats, Ballydehob, Co. Cork, t:+353 (0)28 38973 m: +353 (0)86 158 69 37 e:roeboats@ymail.com

Over she goes, rolling 16′ sharpie micro cruiser.

Here’s a quick slideshow of rolling over the hull of the 16′ sharpie micro cruiser that I’m building at the moment.

This slideshow requires JavaScript.

It was quite easy to do as I slid it up the two sloping 4″ X 2″ pieces and once it was up on its edge I lowered it back down right side up. The hull was quite light at this point. Progress is continuing apace at the moment along with two other projects. So it’s very busy here.

If you’d like to discuss having your own custom boat built why not give  me a call at +353 28 38973 or +353 86 158 6937.